Gmail 2FA Sync
Get Your Codes Instantly
No more switching apps, digging through emails, or typing
codes manually. With Gmail 2FA Sync inside Private Tabs, your
Ticketmaster, AXS, or other 2FA codes appear instantly in your
profile’s toolbar so you can log in faster and keep buying without
interruption. Set it up once, and you’ll always have your verification
codes right where you need them.
How Gmail 2FA Forwarding Works
When a 2FA code email hits your Gmail inbox, we instantly forward it to your
Private Tabs 2FA Dropbox, a secure, hidden email address unique to your profile.
Your Private Tabs extension then displays that code in your toolbar in real time,
so you can enter it instantly without switching screens.
How to set it up:
1️⃣ Log in to Gmail:
- Kindly sign in to your Gmail account.
2️⃣ Access Gmail Settings:
- Click the gear icon in the top-right corner.
- Select "See all settings."

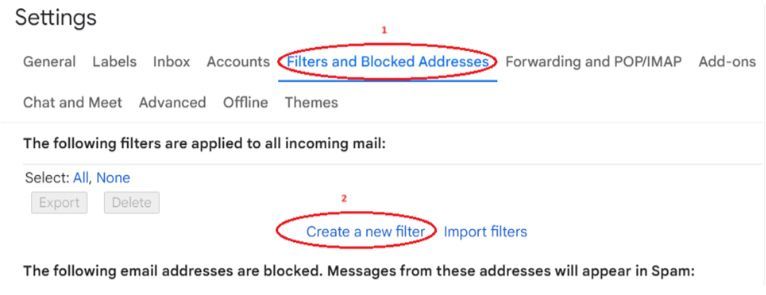
3️⃣ Navigate to the Filters Section:
- Click on the "Filters and Blocked Addresses" tab.
- Click "Create a new filter."
4️⃣ Choosing What to Filter:
You can filter emails based on:
- FROM email addresses
- SUBJECT LINE keywords
- EMAIL BODY keywords
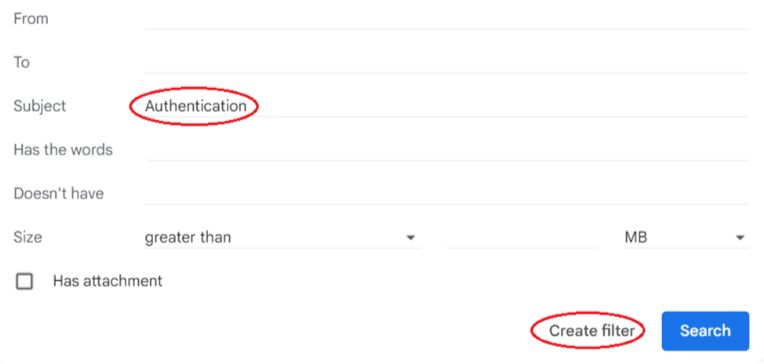
Example 1: Forwarding Ticketmaster 2FA Emails
- Ticketmaster 2FA emails typically contain the word "Authentication" in the subject line.
Steps to create the filter:
a) In the "Subject" field, enter "Authentication."
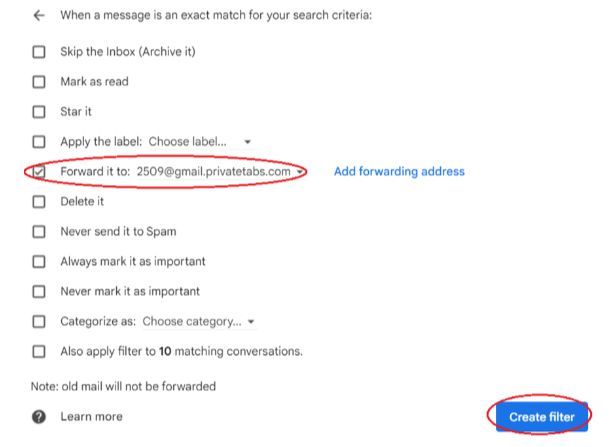
b) Click "Create filter."
c) Check the box next to "Forward it to."
d) Enter the Private Tabs Dropbox email address (which can be found by clicking the green PrivateTabs extension on the right side of the PrivateTabs search bar and copying the email address under "2FA Email Syncing").
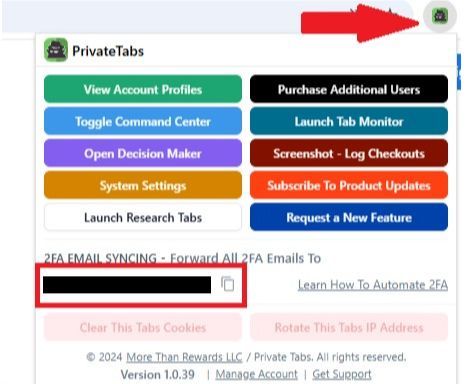
e) Click "Create filter" to save the changes.
Note: Gmail may prompt you to verify your account before enabling forwarding.
Example 2: Forwarding AXS 2FA Emails
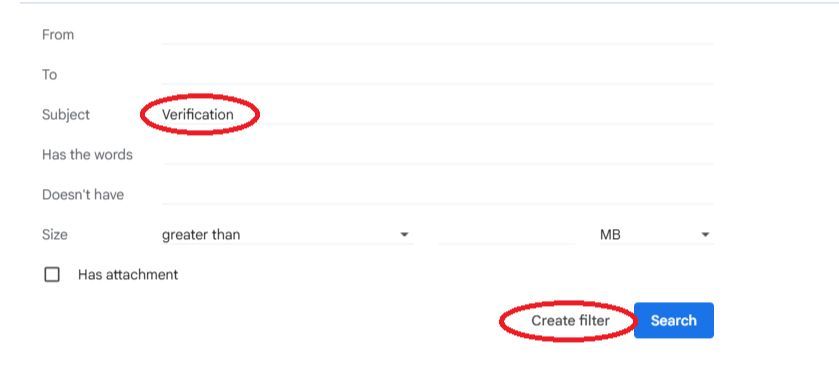
- AXS 2FA emails typically contain the word "Verification" in the subject line.
- Steps to create the filter:
a) In the "Subject" field, enter "Verification."
b) Click "Create filter."
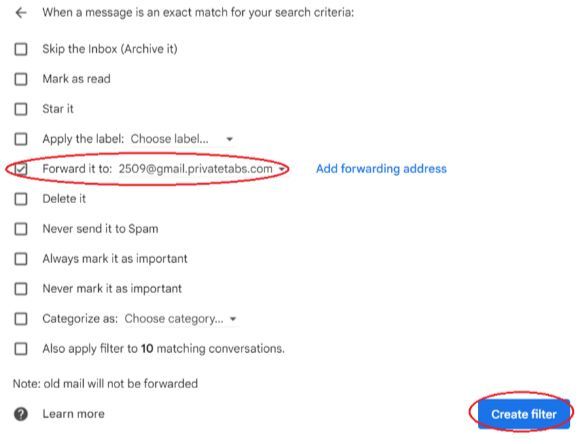
c) Check the box next to "Forward it to."
d) Enter the Private Tabs Dropbox email address.
e) Click "Create filter" to apply the changes.
Additional Notes:
Gmail may require verification before enabling email forwarding.
You should check your inbox for a confirmation email from Gmail and complete the verification if prompted.
Need help setting up?
Call us at
414-326-4100
Book a meeting
here
Or email us anytime at
support@privatetabs.com